Tac MQG

  • Home
  • Classes and Events
    • Calendar
  • About Us
    • Membership Information
    • Donate Opportunities Via Paypal
    • FAQs
    • Bylaws and Meeting Archives
    • TMQG Officers and Board Positions
    • Committees
  • Community
    • Donation Quilts Gallery 2022
  • BOQ
  • Resources
  • Blog
April+BOM.jpg

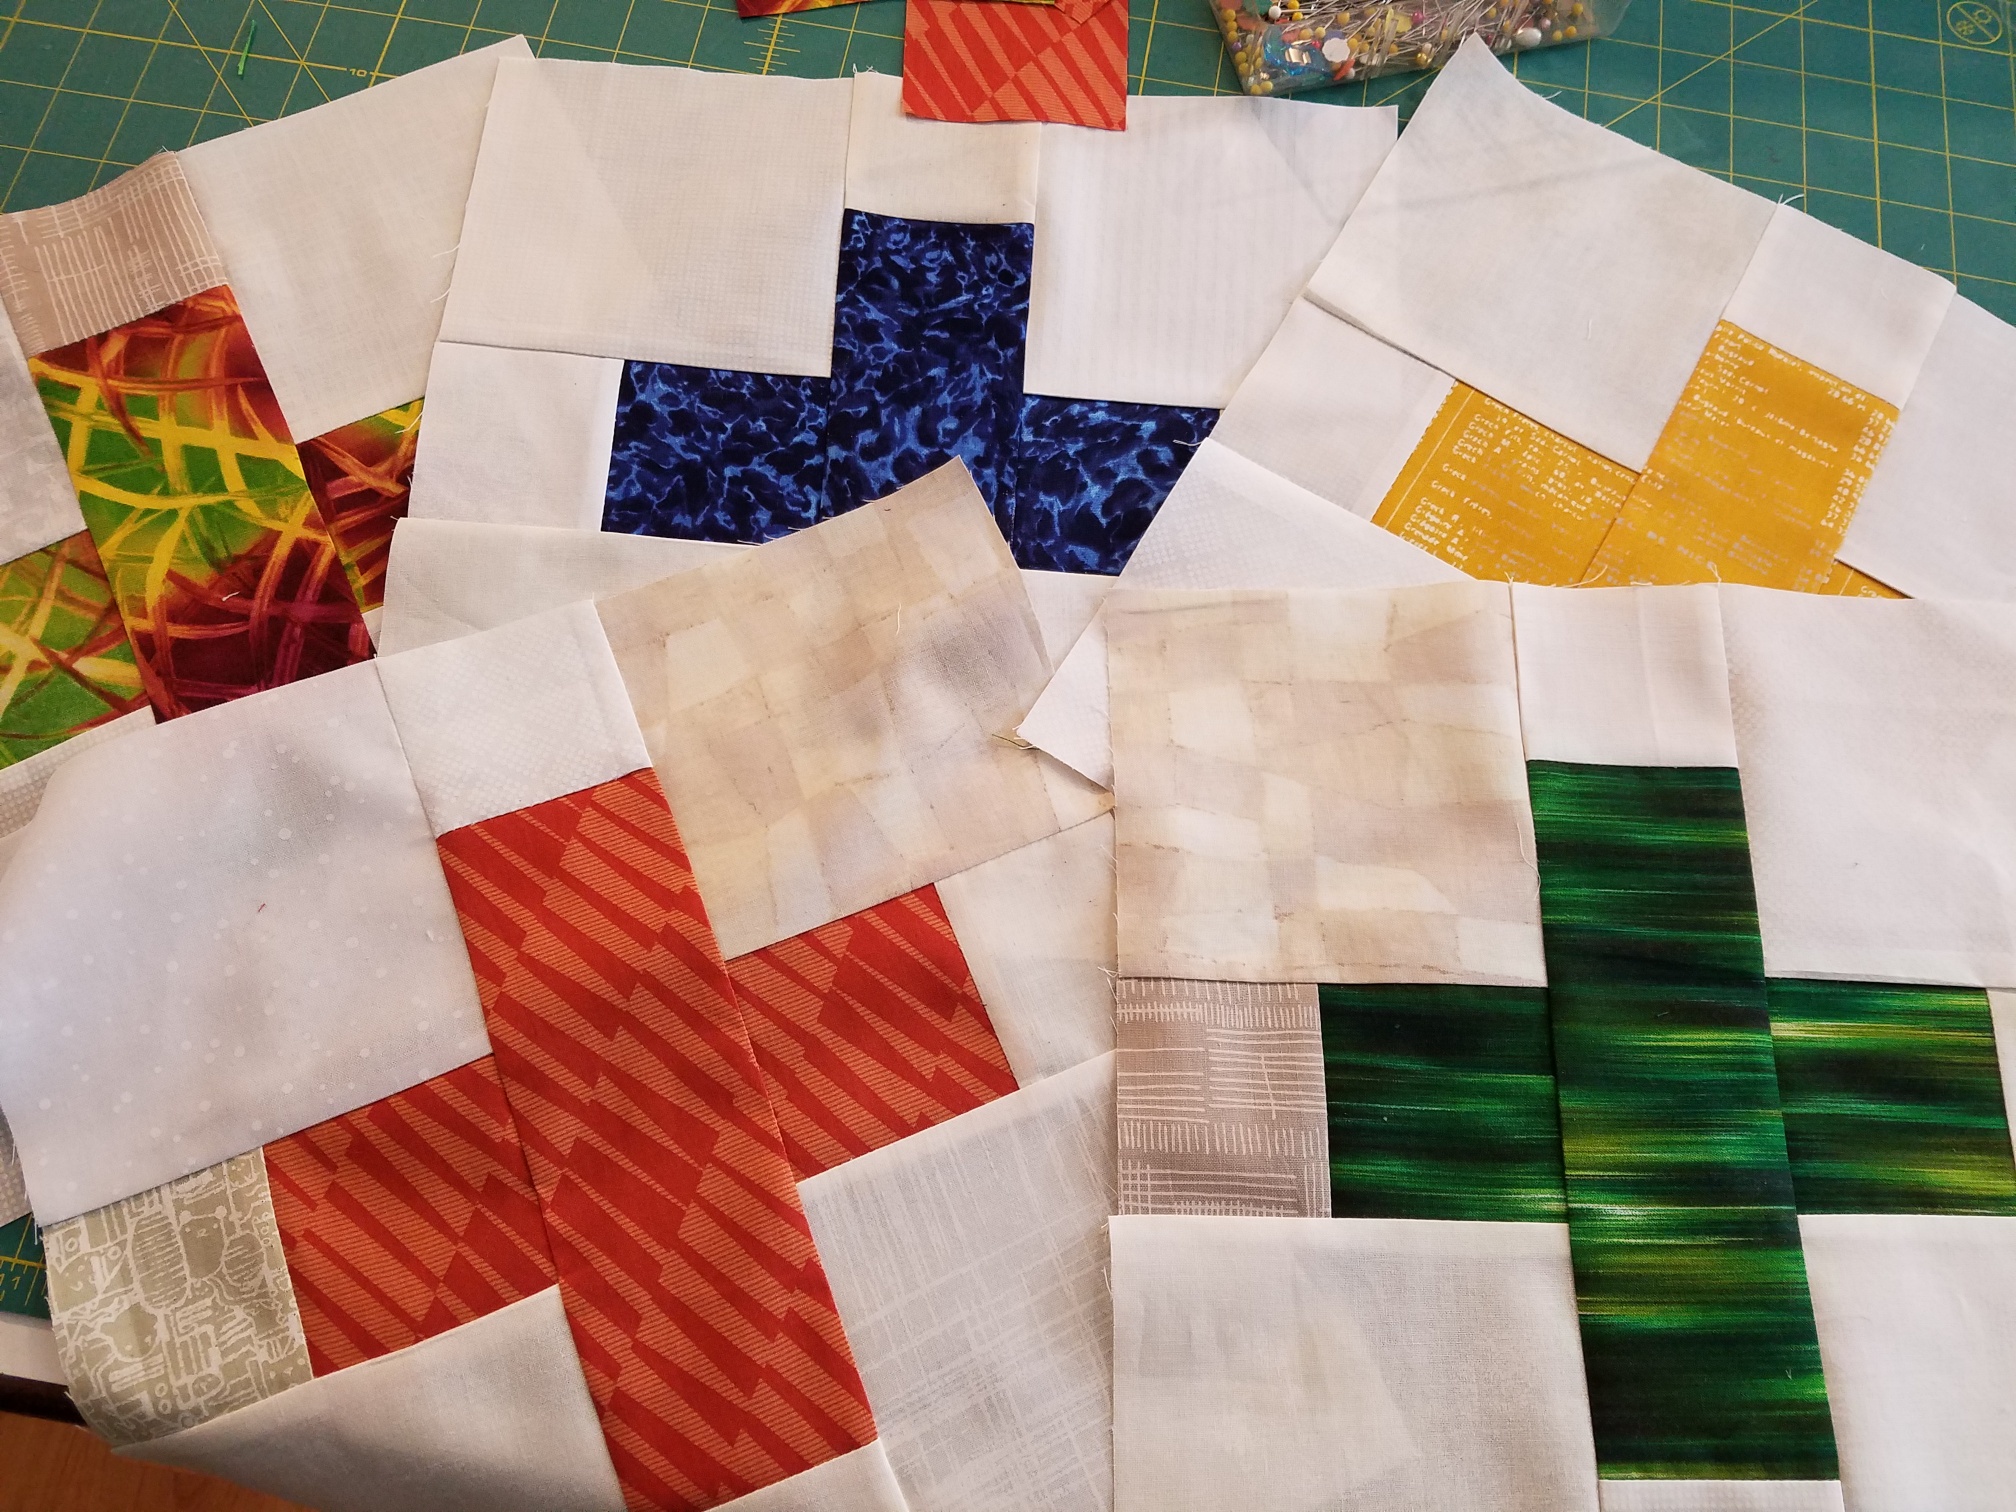
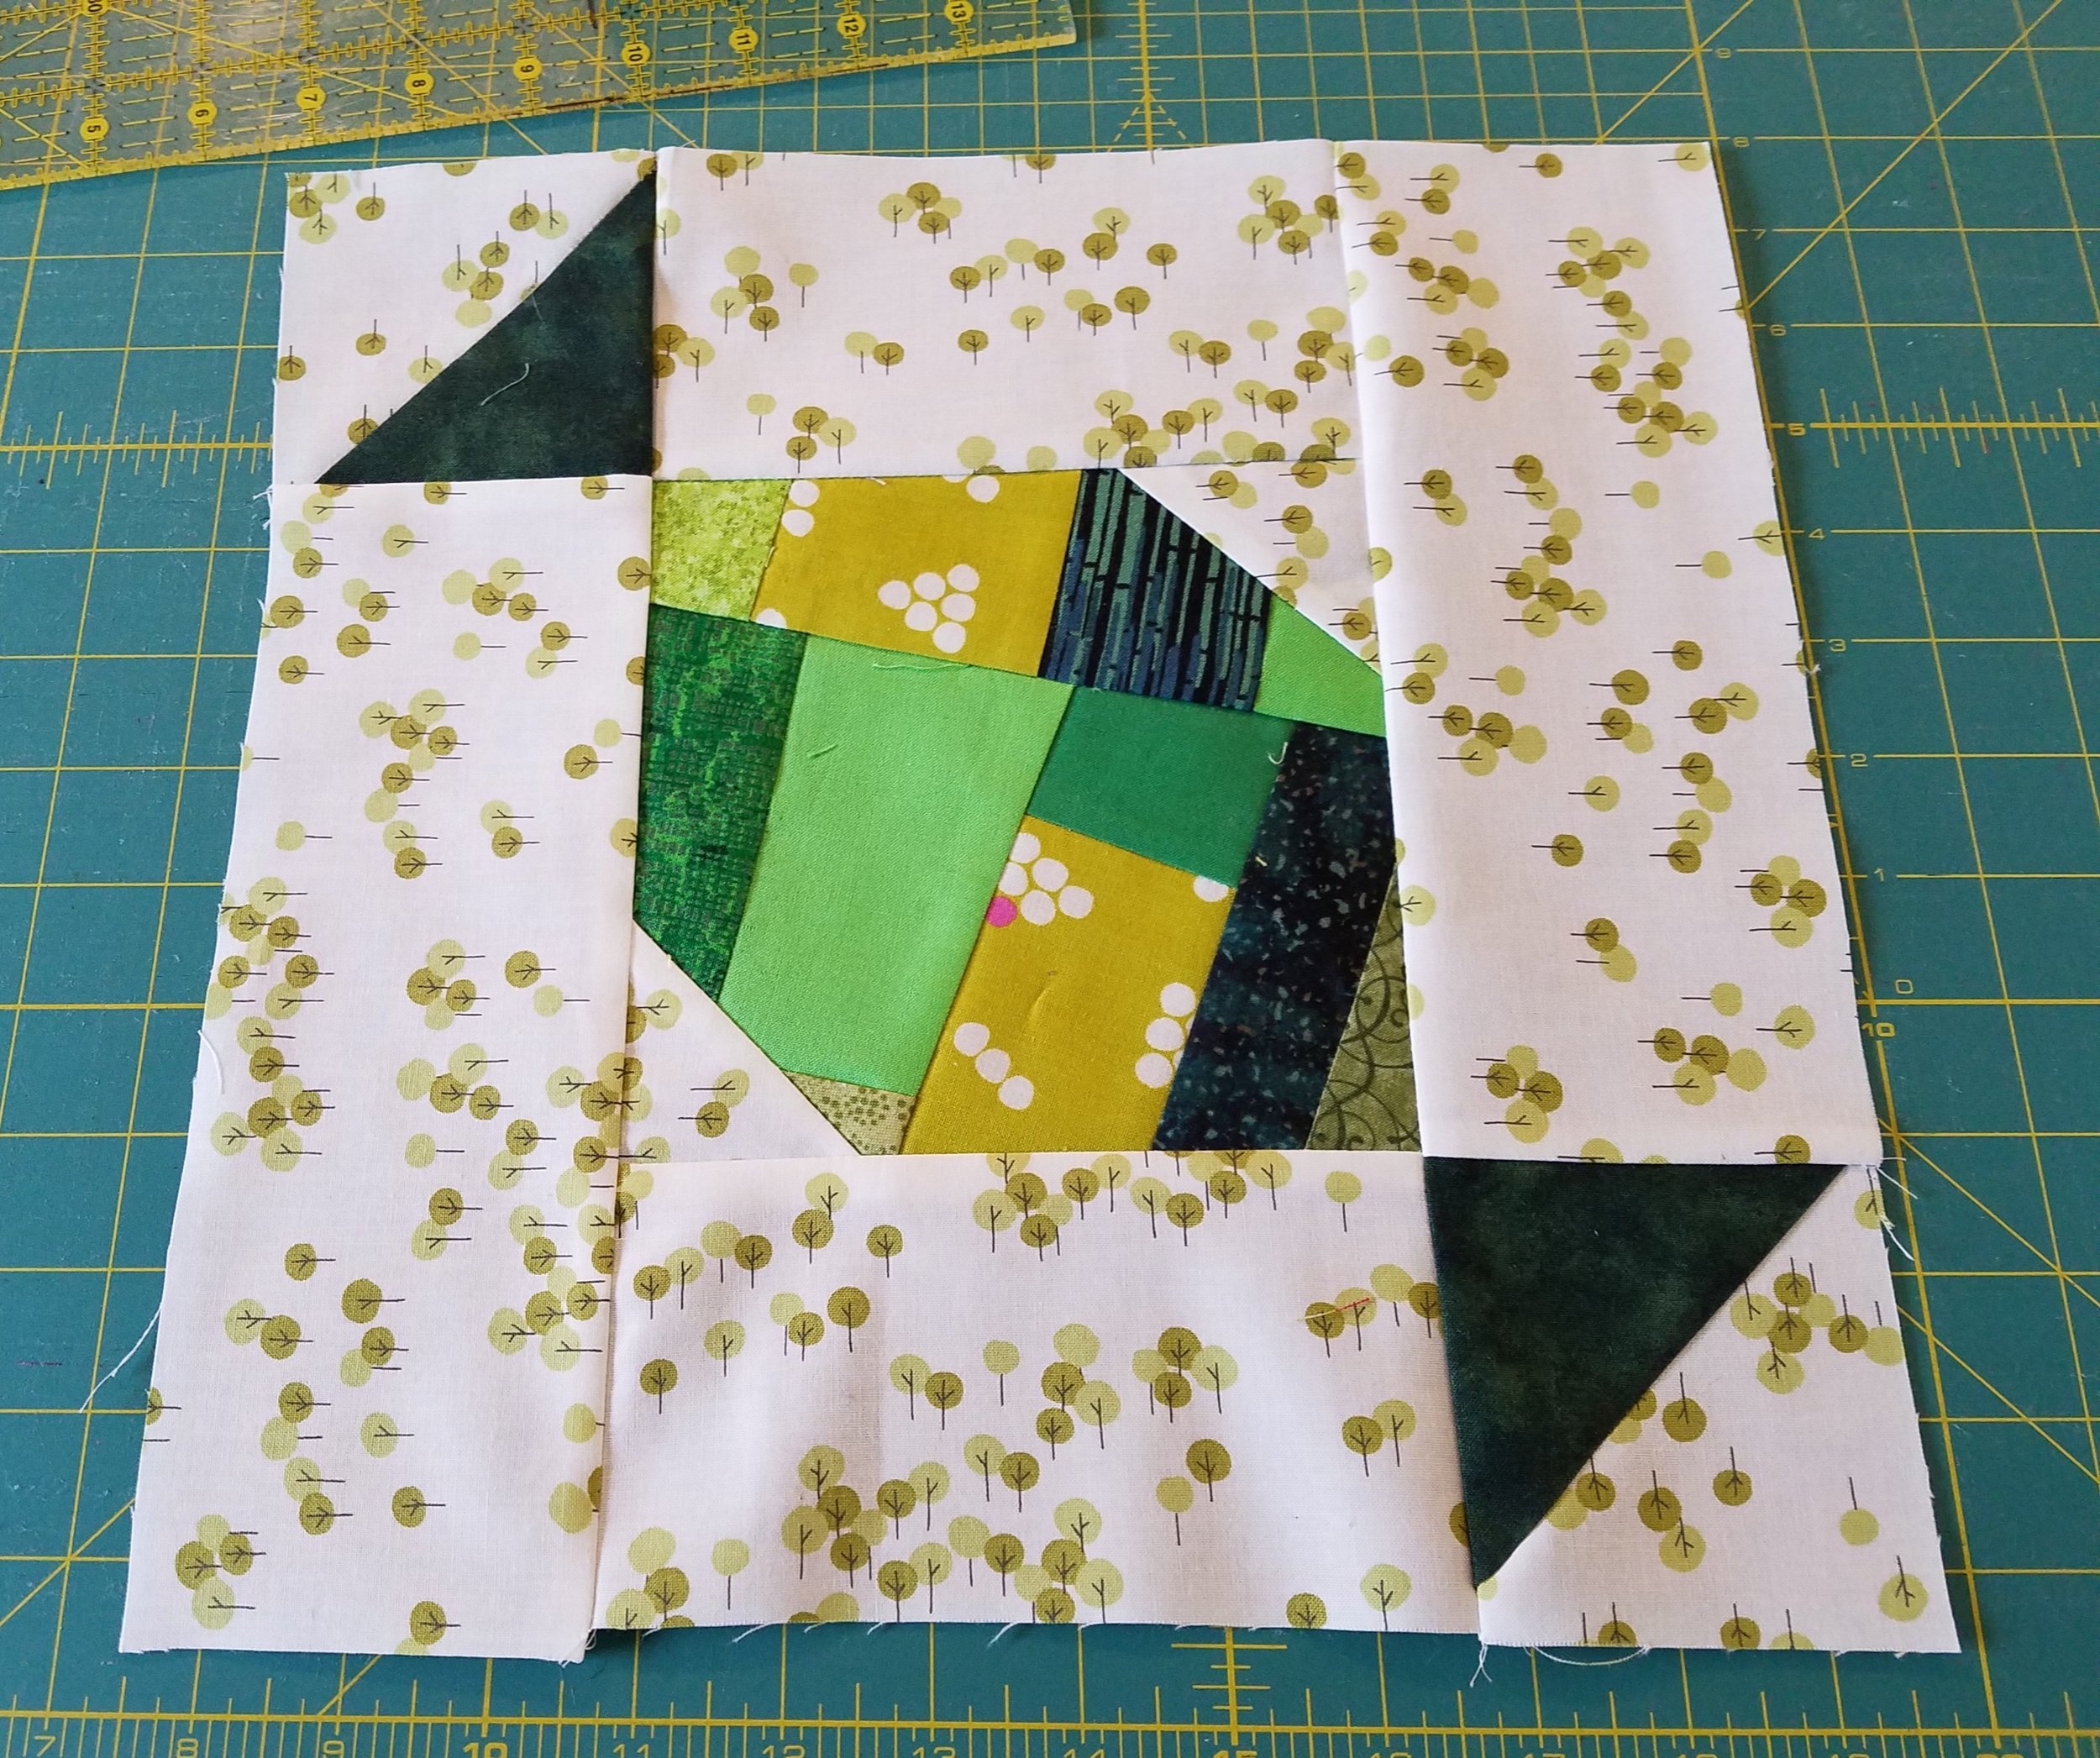
April BOM - Modern Pineapples!

April 22, 2019 by Tacoma MQG

Our Block of the Month for April is Modern Pineapples. We are looking for bright pineapples (any color goes, but think tropical and bright!) The stems should be green though.

These finish at 8” x 14.” Bring your untrimmed blocks to our May meeting!

Find the tutorial by Jackie Padesky here. Have fun!

April 22, 2019 /Tacoma MQG
Block of the Month
Comment
March BOM.jpg
March BOM Diagram.jpg

March BOM - Low Volume Plus Blocks

March 31, 2019 by Tacoma MQG

Our March block of the month is the Low Volume Plus block. Directions for sewing this simple block can be found on the Craft Buds blog.

Our Charity Quilts Committee will be using these for our Seven Seas project (more information to follow soon!) Please make these in bright, bold, gender-neutral colors, on low-volume backgrounds. If you use prints, please choose those without butterflies, flowers, etc. We can’t wait to see what you come up with!

March 31, 2019 /Tacoma MQG
Block of the Month
Comment
CandyFinal.jpg

February BOM - Candy Wrap Block

March 01, 2019 by Tacoma MQG

This tutorial is written by our own Karen Stevens. She found this on Pinterest and is unsure to whom credit should be attributed. Please let us know if you know!

Directions

1. Pick a main color and sew a bunch of scraps together, cut a 6 ½ inch square.

Candy1.jpg

2. Cut additional fabric for background (white, low volume, cream, mostly white with print)

2 - 2 ½ x 2 ½ 2 - 3 ½  x 6 ½ 

1 - 3 7/8 x 3 7/8 2 - 3 ½ x 9 ½ 

AND

Cut 1 - 3 7/8 x 3 7/8 square of your main color (for the tied ends.)

Candy2.jpg

3. Draw a diagonal line on each of the background squares.

Candy3.jpg

4. Place the colored 3 7/8” square and the background 3 7/8” square RST (right sides together) and sew ¼” from each side of the drawn line.  Cut into 2 HST (half square triangles) and trim to 3 ½” square.

Candy4.jpg

5. Lay out the block so you make sure to get the 2 ½” squares on the opposite corners from the wrapper end.  Sew directly on the line, cut, flip the corner out, and press.

Candy5.jpg

6. Sew the 3 ½“square to the top and bottom of the 9 ½” strips.  Sew the 6 ½” strips to the top and bottom of the center 6 ½” square.

Candy6.jpg

7.  Sew the 3 sections together.  Press, but leave the squaring up to 12 ½” to the Community/Charity quilt ladies so they all get trimmed with the same ruler.  

March 01, 2019 /Tacoma MQG
Block of the Month
Comment

© Tacoma MQG